Why the right music makes all the difference.
 Music is at the core of what we do. It is where we get the rhythm, the emotional and contextual content as well as stylistic elements of our choreography. It provides us with the inspiration to move. Choosing the right song is what starts the process rolling. The wrong song can stifle you and creatively block you before you even start.
As a teacher, we know our students well enough that, when we hear a song, we immediately think of a certain dancer. Making sure it’s age appropriate is of course a concern, but making sure the dancer is capable of conveying the content should be paramount. It will be a source of frustration for you and insecurity for your dancer if they never live up to the vision in your head.
It’s also important that you both enjoy the song. It’s always great to introduce your students to some of your favorite classics, but if they don’t like the song, you’ll never get their best work. Likewise, if they suggest something completely out of your taste, you may find inspiration lacking. The last thing you want to do is choose a song that you’re sick of after the tenth time you’ve heard it. You’ll avoid spending the proper time with it and your student will never get your best work. I suggest making playlists and swapping with your student so you can find something you both love.
The next thing to consider is the length. Most songs are too long and in competitive situations there are time limits. Choosing the right sections of a song so that it provides significant variety in musicality keeps your work fresh and your ideas flowing. It creates an arc to follow through the piece. The problem is whether or not all of those sections fit seamlessly together. Many teachers don’t consider how important good music editing is to the choreographic, creative process.
Why good editing makes all the difference.
Good editing ensures the content of the song makes sense and that the musical progression is seamless allowing you to keep your choreographic inspiration flowing. It also increases the enjoyment for your audience. Nothing is more jarring then watching a beautiful lyrical or contemporary piece and having the music jump in the middle of a phrase. In competitive situations, it subconsciously lowers the quality of the piece in the eyes of the adjudicators.
Learning how to edit music yourself is a great money-saving tool in these tough economic times.
 Editing Software
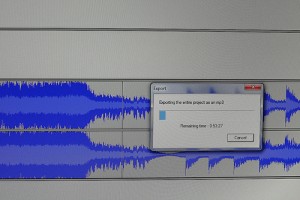
There are many software programs out there that can help you make a good clean edit as long as you know how to use them.
Apple uses Garage Band which all of my Mac using friends seem to love. I’ve only had limited experience with it and I found it difficult to navigate. It was primarily created as simple composition software and the editing features were created to aid in that endeavor. You can use it to edit other files as well and it can give great results if you take the time to learn all of its features.
Audacity is, essentially, the PC version of Garage Band. It has the same purpose of music creation with many editing capabilities. There are free software applications out there but most free software makes me nervous for obvious reasons.
The program I find the most usable and least overwhelming is Sony SoundForge. Its most recent versions are packed with useful features. One I especially like is the Vocal Eraser. This is extremely helpful when trying to keep lyrics appropriate for young audiences.
Cut and Paste Editing
There are different ways to edit your music. The cut and paste is of course the least time consuming. Below are a few points to keep in mind.
- COUNT! – Make sure you end and start on the same beat. I tend to make my edits happen on count 1.
- Pay attention to volume changes – If you’re cutting and pasting and the second section is significantly louder or softer than the one you’re pasting to, it can be very disconcerting.
- Listen for tempo changes – If the music speeds up all of a sudden, you’re not giving your students or audience any warning. In most programs you can change the tempo of the whole song or sections of the song. Take advantage.
- Know when to mix and when to cut and paste – The best time to do cut and paste is if the music fades to almost nothing and comes back in the second section in a similar fashion. Mixing is hard to hide where there is little instrumentation so this works pretty well on acoustic pieces.
Unfortunately, cut and paste creates a lot of problems. Unless the two parts you are editing together are in the same key, it’s not going to sound natural. Understanding key changes and progression in music is very helpful with this. You’ll learn to choose your edits so that you don’t throw off the ear. Like I said, be sure you line up the beats or you’ll have an awkward moment in your choreography. If a key change happens in the measure before, it usually happens on the 7 count so you may want to get that pick up in before making the cut.
Mixing
 In most cases, I suggest mixing your edits. It ensures that you get the end of one phrase, but introduce important transitional elements of the phrase you are cutting to. Some things to keep in mind:
- Choose the number of beats you’ll mix. Usually, you can get away with a one measure (4 beats) overlay. Don’t be afraid to do a longer or shorter mix if necessary. Remember, you’re trying to trick the ear into believing it was meant to be this way.
- Make sure the beats line up. When the beats don’t line up, you’ll hear an odd echo in the drum beat that sounds kind of like a stutter. To best line up the beats, I always suggest zooming in on the section you’re editing and using the pause feature so that you can see exactly where you want the edit to happen. Insert a marker and label it so that you’ll know later what that marker is…i.e. “cut to” or “fade out”.
- Always double check your markers. Sometimes the cursor will jump when you hit pause. You want it to be accurate so you don’t have to go back later and do it all over again. Back the cursor up and find the point where you want to start the fade/mix. Place a marker there as well.
- Do a trial mix first. I suggest doing a plain mix without any fade first and previewing it. This way you can be sure you’ve aligned your beats properly and hear which elements of both sections you want to emphasize in the edit and which you want to lose. You can always click Undo and make adjustments if necessary.
- The FADE. It’s rare that you can just mix two sections and not have awkward bleed through of vocal improvisations or percussive variations. Ninety-five percent of the time, you’ll want to do a fade out of the first section and a fade in of the second. All of the software programs I mentioned have this feature and give you the option of doing a default fade across the length of the measure or a graphic fade. In this case, you can move the fade points up or down and side to side to ensure you’re capturing the elements in the music just right in order to get the best edit. The problem with the default fade is that the two fades will meet in the middle at only 50% which means you’ll have a volume dip in the middle. The graphic fade allows you to adjust your fades in just the right way to avoid this problem.
- Be aware of changes in Volume and Tempo. Once again, these can make a good edit go very bad. You need to adjust tempo before mixing but you can usually adjust the volume in the Mix Dialogue box. If you want to keep a faster tempo in the second edit, you’ll want to adjust your markers so they line up to the ‘one count’ of the tempo you’re moving into.
Ending on the ‘right note’
Endings can often be difficult. It’s not always appropriate to fade out and it doesn’t always musically make sense to just cut off. Sometimes you need to use features like reverb or delay to create an ending that doesn’t leave the ear wanting resolution. You can also use sound effects, when appropriate, to force an ending.
Music editing can be extremely fun and creatively fulfilling if you have the passion, energy and time to really perfect the process. It can also make your job as a choreographer much easier. But making sure you have the right song first is definitely the most important part of the process.
Feel free to contact me if you have any questions. I hope this article helps you more easily navigate the process and bring your work to the next level.
Jason Marquette graduated with a BFA in Musical Theater from the University of the Arts in Philadelphia. His performance credits include the first national tour of the revival of 42nd Street, The Musical (original cast) and regional theaters all around the United States. Jason taught at BDC for the past 6 years but has been teaching for over 17 years. He has since taught in cities all across the country as well as internationally in Helsinki, Finland and Guayaquil, Ecuador. He is currently scheduled to teach in Guatemala and Italy this year. In 2008 he mounted his self-produced NYC production called The Next Step. His choreography has also been seen in the SUNY New Paltz Production of Stephen Sondheim’s Company as well as music videos and various performance projects in New York and around the world. His work will appear in The Group Theatre Too’s Choreographer’s Canvas on May 11 of this year. He is the owner/operator of Marquette Productions – Music Editing and More www.marquetteproductions.com and The Marquette Theater Project – Making theater matter again. He plans to produce another production in the fall of 2012. For more about Jason and to see his up-to-date schedule of events, you can check out his website at www.jasonmarquette.com

Dance Advantage welcomes guest posts from other dance teachers, students, parents, professionals, or those knowledgeable in related fields. If you are interested in having your article published at Dance Advantage, please see the following info on submitting a guest post. Read posts from guest contributors.


